Wednesday, September 28, 2011

Walk of Fame -September 2011


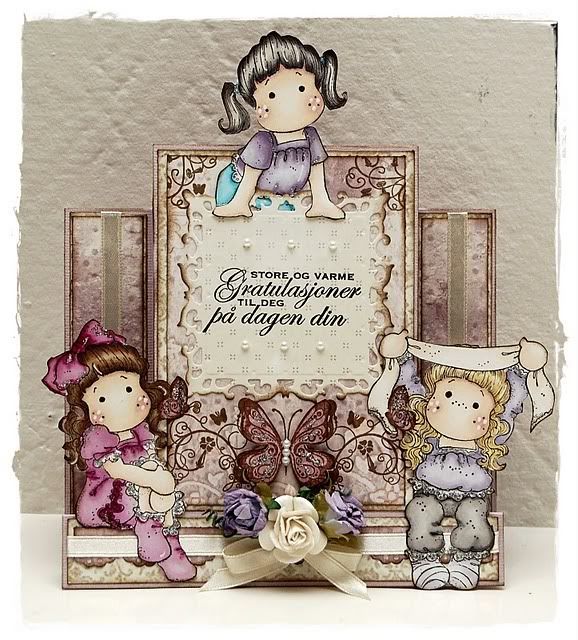
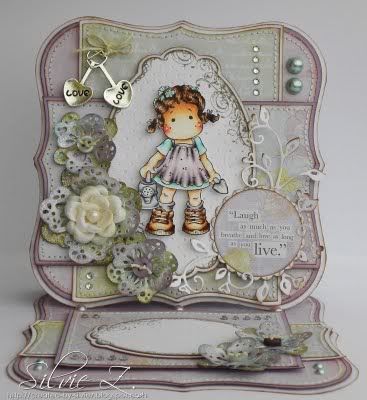
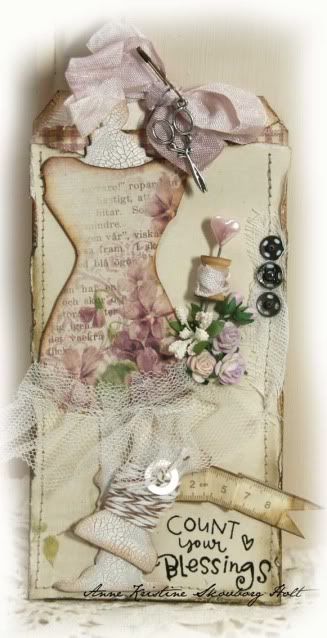
Så har ännu en månad passerat och som vanligt har vi finkammat bloggvärlden på jakt efter exceptionella kort. Och som vanligt har vi också funnit massor av underbara alster. Det är alltid lika svårt att välja ut några enstaka av dessa, men här är i alla fall de kort som valts ut till september månads Walk of Fame:


Yet another month has passed and as usual we have "scanned" your blogs for marvellous creations. And as usual we have found lots and lots of fantastic cards and other projects. As always it is difficult to pick out just a few of them, but here are the cards we finally chose for September month´s Walk of Fame:


Soo beautiful, all three of them!! 

Thank you ladies for this wonderful inspiration!


Gratulerar * Congratulations* Onnea !! 


Sunday, September 25, 2011

Tutorial - Handkerchief box

Autumn is here and my family is taking turns on beeing ill from stubborn colds. So what better than to make your own "First aid cold-kit" ;)

****

Hösten är här och i min familj turas vi om att dras med envisa förkyldningar. Så vad kan vara bättre än ett hemmagjort "Förstahjälpens förkyldnings-kit" ;)


Start with a cardstock size 30x19 cm and follow the instruction below.
( ----- = cut , _____ = fold)

****

Skär till ett cardstock i storleken 30x19 cm och följ mallen nedan.
(----- = Klipp, _____ = vik)


When you are done it should look something like this:

****

När du är klar ska det se ut såhär ungefär:


Cut out the hole for the tissues and start to put patterned papers on the part that is going to be the box.

****

Skär ut hålet där näsdukarna ska dras fram och börja klä in askdelen med mönstrat papper.


When you are done, turn the whole thing (patterned paper down, facing the table) and fold the box.
Glue the 12 cm paperback to the boxpart's backside. The box should fit a handkerchief package that you can buy at your local store or at the pharmacy.

****
När du är klar så vänder du på hela papperet (så det mönstrade sidan ligger neråt mot bordet) och viker ihop asken. Limma fast 12 cm baksidan mot askdelens baksida. Asken ska passa till näsdukarna som man köper i affären eller på apoteket.


Now the fun part of decorationg the box begins :)

**** 

Nu börjar den roliga delen med att dekorera asken :)


Just think of this! Don't decorate the "back" with heavy things. It may tilt :)

****

Tänk på en sak! Dekorera inte "baksidan" med för tunga grejer. Då den kan tippa.:)
****

I made a little holder for lip-balsam on the side.

****

Jag gjorde en liten hållare till lypsylen på sidan.


The patterned papers are from Pion Design. The stamps are from Magnolia.

****

Det mönstrade papperet är från Pion design och stämplarna från Magnolia.


I hope that you liked my tutorial and if you have any questions feel free to e-mail me at stampartic@gmail.com and I'll answer :)

Hugs
Malin

****

Jag hoppas att ni gillar min tutorial och har ni frågor eller funderingar så är det bara att maila till mig på stampartic@gmail.com så ska jag svara :)

Kram
Malin

Thursday, September 22, 2011

Shopping tips September 2011

Fall has began and all it's beautiful colours has take place in the nature. Sunlight fades away from us every day earlier but the fresh fall air and beautiful sunny days will bring light to our lives. It's also so cheerful to make good shoppings and get some new materials for crafting

We have made some shoppings and we're willing to share those with you.


Jannhild

I just love dies, and I just want them all!!! Here are some favorits:


These and a some more of Cherry Lynn Design dies and Marianne design dies you can find at Scrapmagasinet.


Malin

I've bought Kraftin' Kimmies lovely stamps. If I had a lot of money I would buy them all! I found these ones at Pysseltagen.


Marianne

My shopping tip this time will be Pion Designs new paper collection ”Ventan på tomten II”.
These are the most beautiful Christmas papers ever!


Maissi


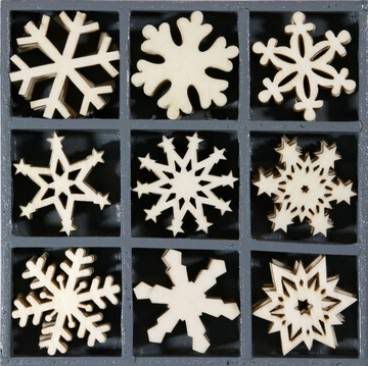
I found these wonderful wood ornaments from Kars. I bought them from Heinikka.


Maissis tip


Lene

Its soon Halloween and I think we need a bit new dies to create
scary packages to those who
knock on our door..
Anyway; these dies are made in cooperation with Tim Holtz for Sizzix.
I find my dies here
Frantic Stampers


Petra

I LOVE LOVE LOOOOOVE clearstamps-alphabets!
And here are some new favorites from Kaisercraft;


You can buy them for example at Scrapbruket.com


We hope you'll get nice tips for your shoppings from here!

Monday, September 19, 2011

~Reader Gallery~


Welcome to reader gallery
where we showcase some great
Reader contributions.


We find that more and more follow our tutorials
and we are very happy when you link back to our blog.
What we are EVEN more happy is when you send us an email
where you show us what you have created!
Then we can, together with you, show the world how inspirational YOU are!


Sylvia

Sylvia has made a lovely three card inspired by The Tree tutorial


She has also been inspired by our "Make your own flowers"
and made two beautiful cards.


Kerstin

Kerstin has been inpired by Petras Wallet card tutorials and
made this beautiful wallet card.


Remember to e-mail us or leave a comment, if you have been inspired
by any of our articles.
We are looking forward to show of your project in our magazine


***************************************************************************
********************************************************************************

REMINDER:
We are looking for two new designers to our designteam!


The job includes, among others, to create inspirationcards to various sponsorarticles and challenges.

We also want you to help us with the administrative work so that StampARTic can continue publication.

The job requires an average of about one hour per week in front of your computer.

We would also like for you to be reasonably good in English.


Rules:


  • You have to live in Scandinavia (Denmark, Finland, Norway or Sweden)
  • Make a card after the sketch below and send it to: stampartic@gmail.com
  • We would also like to have your name, nationality and your blog address in the email.
  • Mark the mail with "DTcall".
  • Only handmade cards are allowed to participate.
  • The deadline for applications is Friday 30 September, 23.59 *beep*


Thursday, September 15, 2011

ARTsy Julekort Utfordring

Time is getting closer to Christmas, and i's time to think about Christmas cards. This time we will have an ARTsy challenge for you, and it's going like this...

Make a ARTsy Christmas card or tag!
You can not use the color red, green or blue!
Everything else are fine!
Deadline is 1st October at midnight StampARTic time!

Tiden nærmer seg fraskt mot jul, og det er kanskje best å sette i gang med julekort-produksjonen? Vel, vi ønsker å se mange julekort i tiden fremover, og hvorfor ikke prøve seg på et par artsykort? Det har Marianne og Eva på StampARTic gjort og vi håper at mange av våre lesere også har lyst til å lage noe i denne stilen. Så her kommer en utfordring til dere...

Lag et ARTsy julekort eller tag!
Et krav - du har ikke lov til å bruke rødt, grønt eller blått!
Alt annet er valgfritt!
Frist for levering er 1. oktober innen midnatt StampARTic time!

Premien sponses av:

Her er kort fra desigteamet:

Eva's tag...


Bakgrunnen og chipboardene er dekket med distress blekk. På chipboardene er det i tillegg brukt Rock Candy Crackle Paint fra Ranger. / The background is made with distress ink. Chipboards is also covered with distress ink additional to Rock Candy Crackle Paint.

Marianne's card...


Kortet er laget med metalltape og dekket med akrylmaling / the card is made with metallic tape and acrylic paint

Inger's cards...


Bakgrunnen er laget med gel medium, gesso, Lumiere og mini beads / Background is made with gel medium, gesso, Lumiere and mini beads.


Bakgrunnen er laget gel medium, Lumiere og distress blekk / background is made with gel medium, Lumiere and distress ink

Silje's cards...

Bakgrunnen er laget med distress blekk, vann og perfect pearls mist / background is made with distress ink, water and perfect pearl mists


Bakgrunnen er laget med distress og perfect pearl mists / bacground is made with distress ink and perfect pearl mists

To enter the challenge, please leave your name and link to your card below!

Enjoy your ARTsy-time, and good luck!